Recently, an open-source project called OpenClaw (formerly known as clawdbot) has taken the tech world by storm. It is a personal AI assistant that can run on any system and any platform. What truly sparked widespread interest is that it is not just a large language model, but a complete AI agent system built upon large language models.

How powerful is it? OpenClaw can directly control your computer system, helping you read emails, reply to emails, and even assist with your work, including writing and compiling code. Even more impressively, once deployment is complete, users can directly use common social software as the interaction interface. This means you can simply pick up your phone, open a social app, and converse with OpenClaw at any time.
After the project gained widespread attention, many people chose to purchase the compact, low-power Mac Mini M4 to deploy OpenClaw. However, OpenClaw itself relies on APIs from cloud-based model service providers, meaning it does not require powerful local computing power. It can run perfectly well on more compact and even lower-power single-board computers.
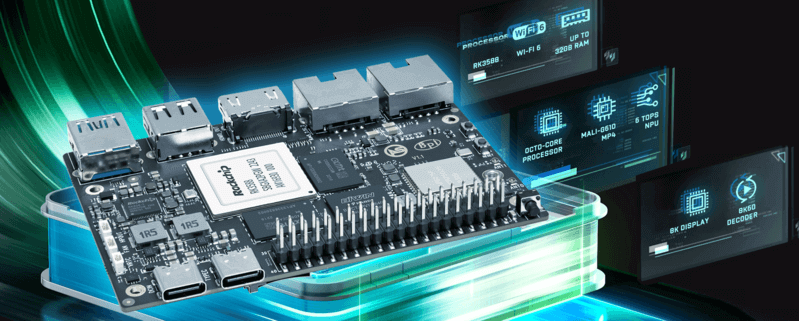
Take, for example, the ArmSoM-Sige7, equipped with the RK3588 SoC. It is not only more compact and energy-efficient but also offers excellent expandability and open-source support — Why stop at Mac Mini for deploying OpenClaw? ArmSoM-Sige7 delivers the same performance with a lower barrier to entry.
Complete Guide to Installing OpenClaw on ArmSoM-Sige7
This guide will walk you through easily deploying the OpenClaw personal AI assistant on your ArmSoM-Sige7 high-performance single-board computer. With its powerful RK3588 SoC and low-power characteristics, the ArmSoM-Sige7 is an ideal hardware platform for running OpenClaw. The entire process is simple and quick, requiring only three steps.
Prerequisites
- System Requirements: Ensure your ArmSoM-Sige7 is connected to a network and running a Debian/Ubuntu-based Linux distribution (such as the officially provided Debian or Ubuntu image).
- Install Git: Some dependencies for OpenClaw may need to be fetched from Git repositories. First, install Git by running the following command in the terminal:
sudo apt update && sudo apt install git -y
Installation Steps
Step 1: Install Node.js (Recommended via NVM)
Using Node Version Manager (NVM) makes it easy to install and manage Node.js versions.
- Download and install NVM:
curl -o- https://raw.githubusercontent.com/nvm-sh/nvm/v0.40.4/install.sh | bash - After installation, restart your terminal, or run the following command to activate NVM immediately:
export NVM_DIR="$HOME/.nvm"
[ -s "$NVM_DIR/nvm.sh" ] && \. "$NVM_DIR/nvm.sh" - Use NVM to install a Long-Term Support (LTS) version of Node.js (e.g., v22):
nvm install 22 - Set the newly installed version as the default:
nvm use 22
nvm alias default 22 - Verify Installation: Execute
node -vandnpm -vto confirm the successful installation of Node.js and the npm package manager.
Step 2: Install OpenClaw
Install OpenClaw globally via npm (Node.js package manager):
npm install -g openclaw@latest
This command will download and install the latest version of OpenClaw and its core dependencies from the official repository.
Step 3: Initialize and Start OpenClaw
Run the initialization wizard, which will guide you through the basic setup and install the background daemon:
openclaw onboard --install-daemon
During this process, you may need to:
- Configure your cloud-based large model API keys (e.g., OpenAI, Claude, etc.).
- Set your personal preferences and security options.
- The program will automatically configure system services so that OpenClaw starts on boot.

Post-Installation Actions and Verification
- Check Service Status: After installation, you can use the following command to check if the OpenClaw background service is running normally:
systemctl --user status openclaw-gateway - Start Interacting: Once started, OpenClaw will by default provide a local web access interface or await connection from your configured social software (like Telegram). Please proceed with the next steps for access setup based on the prompts after installation completes.
- View Logs: If you need to troubleshoot issues, you can view the service logs:
journalctl --user -u openclaw-gateway -f
Helpful Tips
- Hardware Advantage: The low power consumption and excellent thermal design of the ArmSoM-Sige7 ensure the stable operation of OpenClaw as a resident service.
- Security: Please securely store the API keys you entered during the initialization process to avoid leakage.
- Updates: If you need to upgrade OpenClaw in the future, simply repeat the command from Step 2:
npm install -g openclaw@latest. - Resources: For more advanced configuration, plugin usage, and troubleshooting, please refer to the OpenClaw official documentation.
Now, your ArmSoM-Sige7 has been transformed into a powerful AI agent workstation, ready for interaction via your phone at any time. Enjoy the convenience of automation it brings you!
Usage Example
Scenario: Blog Automation from Idea to Publication
This is a composite scenario that strings together multiple steps, demonstrating OpenClaw's ability to act as "glue" connecting different services.
Workflow Design:
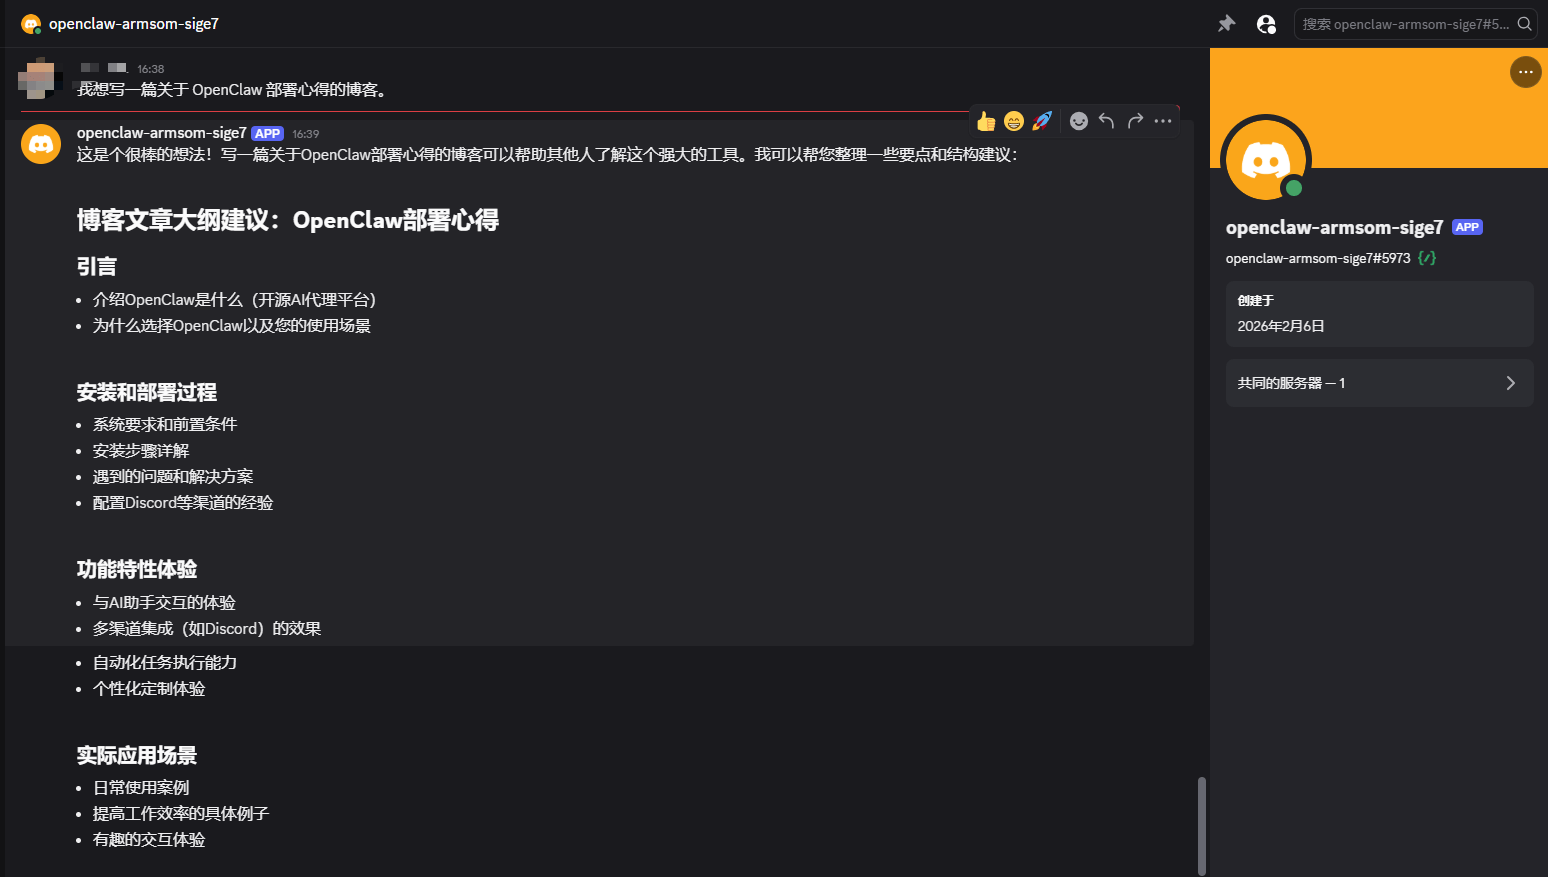
- Trigger: You send a voice message to OpenClaw in Telegram/Discord: "I want to write a blog post about my experience deploying OpenClaw."
- Execution:
- OpenClaw converts the speech to text, generates an article outline, and requests your confirmation.
- After confirmation, it begins drafting the initial version based on the outline.
- Once the draft is complete, it uses coding tools to push the Markdown-formatted draft to a specified branch in your GitHub repository.
- Simultaneously, it creates a task card in your project management tool (e.g., Trello) to track progress.
- Finally, it notifies you via Discord: "The blog draft is complete and has been submitted to GitHub for your review."
- Follow-up: You can instruct it to proceed with subsequent steps like image generation, SEO optimization, etc.