Flash Image
The system images of the ArmSoM series products include a variety of root file systems. We can choose the corresponding image to download according to our needs.
The system image includes the linux kernel, basic programs, etc., and is necessary to run ArmSoM series products, so we need to install the image for the product before running the product.
1. Obtain system image
Visit the Google Drive resource introduction page to obtain the system image: Google Drive link
- The default account/password of the official image is armsom/armsom.
- The Debian system is a system compiled using the SDK officially provided by RK. It is more suitable for users with ISP, GPU, codec, and NPU requirements. Use RKDevTool to burn to eMMC, or use SDDiskTool to burn to SD card.
- Ubuntu, Armbian, Openwrt are more choices provided by ArmSoM for open source enthusiasts.
2. Burn Ubuntu, Armbian, Openwrt system
2.1. Burn card reader to microSD
Flash the operating system image to microSD via Etcher
This method is suitable for burning the system to the SD card, and is available for Windows, MacOS, and Linux x64 operating systems.
 1. A microSD card
 2. An SD card reader
 3. Download the Ubuntu / Armbian / Openwrt system image of the corresponding product
 4. Insert the SD card into the SD card reader, and then insert the SD card reader into the USB port of the computer
Flash the operating system image to microSD via Etcher
Download balenaEtcher from balena official website and select the specified host system to download. The program format of Linux here is AppImage.
Insert the MicroSD card to be burned into the MicroSD card reader
Open the etcher window, first select Flash from file, find your image download location, and double-click to select it.

- Then click Select target and select the MicroSD card you want to burn.
- Click Flash, wait for the burning to be successful, it will take some time.
- If the burning is successful, it will be displayed as shown in the figure.

 1. The windows burning image needs to be "run as administrator". Some Linux users may need to modify it to run as executable through the chmod command.
 2. If there is an error in flashing the operating system image, please try again.
Flash the operating system image to microSD via Win32DiskImager
- Download Flash tool Win32DiskImager
- Open Win32DiskImager
- Click the folder icon button and select the image you want to flash
- After completing the above operations, click the Write button to start flashing the image, and then wait for the writing of the image to complete.
2.2. USB cable burning to eMMC
2.2.1. Tool acquisition and installation
Burning the image to eMMC requires the use of RKDevTool burning tool and RK Driver Assistant (DriverAssitant)
Click to enter the link: google drive link
2.2.2. Install DriverAssitant
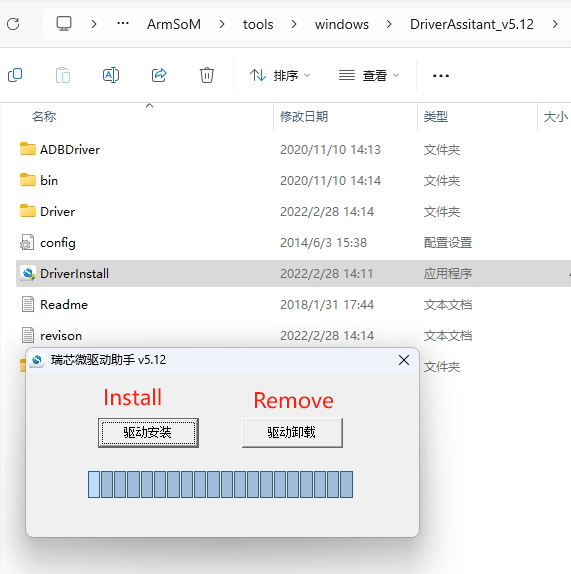
Unzip the DriverAssitant software compressed package and double-click DriverInstall.exe to enter the driver installation interface.
Click Driver Installation to start installing the driver. If you are not sure whether an older version of the driver has been installed before, first click Driver Uninstall to remove the old version of the driver, and then click Driver Installation.
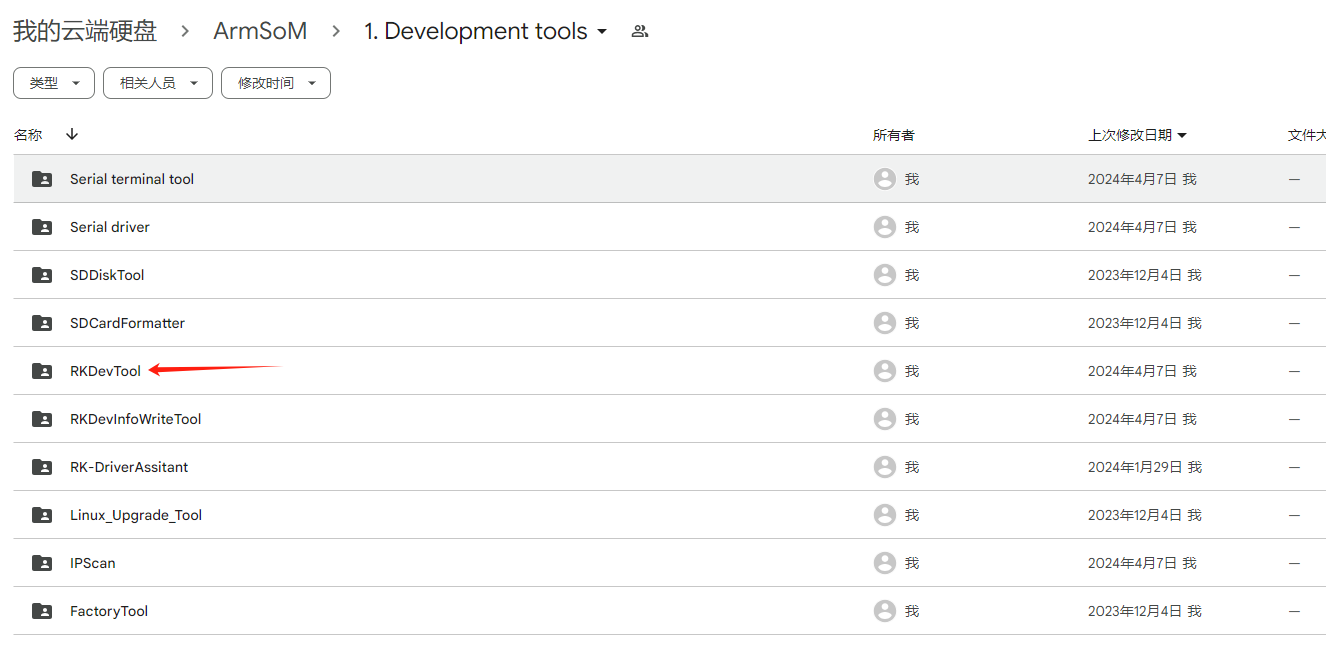
2.2.3. Install RKDevTool
Rockchip's dedicated USB burning tool, Windows platform, can use the USB interface to download the system image to the product.
After decompressing the compressed package, you can use it without installation. Double-click RKDevTool.exe to enter the software interface.
The software mainly has three parts, namely downloading the image (the image can be burned according to the address), upgrading the firmware and advanced functions.
2.1.4. Burning image in MASKROM/Loader mode
This mode is suitable for products that have not been burned into the system or the burned system is damaged and cannot run (adaptable to all conditions)
We open the RKDevTool burning tool and set the product to enter burning mode.
Please refer to the relevant instructions of the product to operate. The methods of entering Maskrom mode for different products are basically the same.

1. Prepare Type-C cable for image burning
2. Disconnect all connections that may provide power to the product, such as power cords, USB cables, etc.
3. Use a Type-C cable to connect one end to the product's OTG interface and the other end to the computer's USB interface, then open the software RKDevTool
4. Press and hold the MASKROM/Recovery button, and then use DC to power the product
5. Wait for the software prompt to find a MASKROM/LOADER device (as shown in the picture below), then release the button
6. If unsuccessful, repeat steps 2-5.
Start burning the system
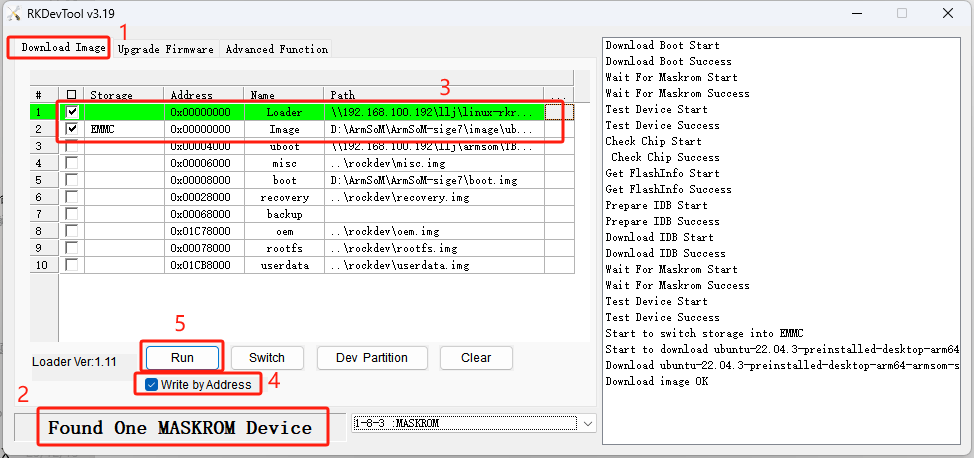
- Select the Download Image item
- Confirm that the board has entered Maskrom mode
- Click on a blank cell to select the MiniLoaderAll and Image files to be used. The corresponding MiniLoaderAll and Image are stored in google drive.
- Select the target medium EMMC in the Storage option, select Force writing by address, and click Execute.
- Wait for the writing to complete, and then the device will automatically restart, as shown on the right side of the picture above Download image OK
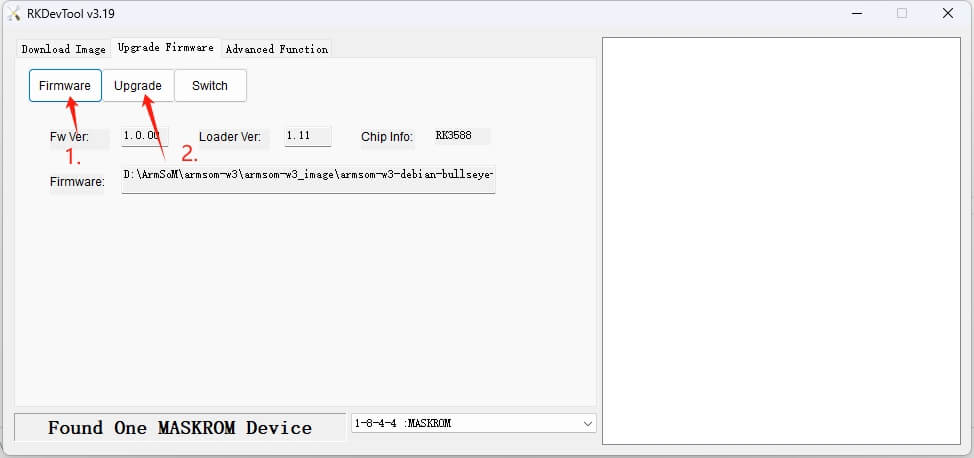
3. Burn Debian system
3.1. Burn card reader to microSD
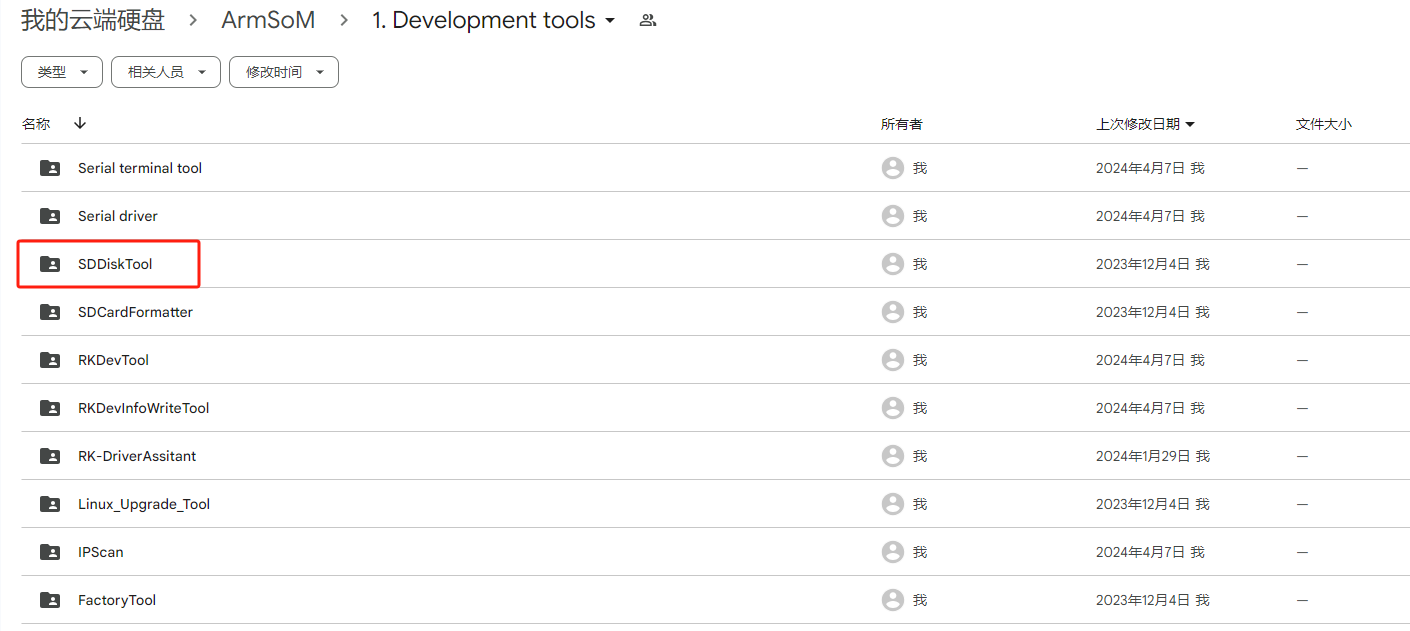
Install SDDiskTool
Burning the image to eMMC requires the use of the burning tool SDDiskTool_version number.exe
Click to enter the link: google drive link
After decompressing the compressed package, you can use it without installation. Double-click SD_Firmware_Tool.exe to enter the software interface.
Burn image
Open the executable file SD_Firmware_Tool.exe that burned SDDiskTool and insert the SD card.
First select the correct SD card to be burned, then select the function mode to SD Boot, then select the image to be burned, and finally click to start creating the burned image to the SD card.

Wait patiently for the SD card to be burned completely. When the image size is larger, the burning time will be longer accordingly.
- When you click Create, there will be a certain probability that an error message will be reported saying that it cannot be burned. You can close the error window and start creating again. If it still doesn't work, try formatting the SD card.
- The firmware downloaded from google drive needs to be decompressed before loading, and Windows PC needs to run the tool with administrator rights before it can be executed.
3.2. USB cable burning to eMMC
We open the RKDevTool burning tool and set the product to enter burning mode.
1. Prepare Type-C cable for image burning
2. Disconnect all connections that may provide power to the product, such as power cords, USB cables, etc.
3. Use a Type-C cable to connect one end to the product's OTG interface and the other end to the computer's USB interface, then open the software RKDevTool
4. Press and hold the Recovery button, and then use DC to power the product
5. Wait for the software prompt to find a LOADER device (as shown in the figure below), then release the button
6. If unsuccessful, repeat steps 2-5.

The flashing progress is displayed on the right, and it will prompt you after completion:
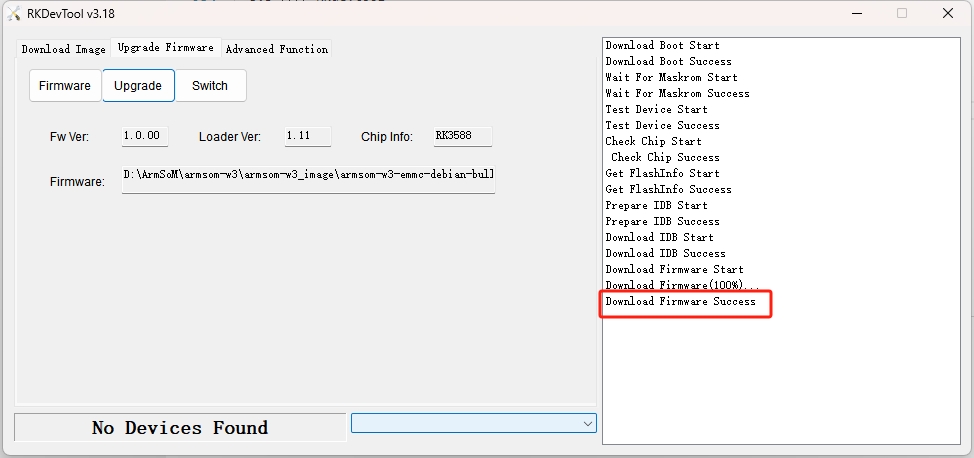
If Download Boot Fail occurs during the programming process, or an error occurs during the programming process, as shown in the figure below, it is usually caused by poor connection of the USB cable used, inferior wire material, or insufficient driver capability of the computer USB port. Please replace the USB cable or Troubleshooting computer USB ports.
- Maskrom: When the Flash firmware is not burned, the chip will boot into the Maskrom mode, and the initial firmware can be burned; If the Loader fails to start normally during development and debugging, you can also enter Maskrom mode to burn firmware.
- Loader: The principle is that the pin is detected to be pressed during uboot startup. In Loader mode, firmware can be programmed and upgraded. You can use tools to burn a partition image file separately to facilitate debugging.