OpenCV Development Example
1. Overview
OpenCV is an open-source computer vision library for reading images and video, converting colors, reducing noise, finding contours, and analyzing changes between frames. In Python, an image or video frame is typically represented as a NumPy array. The same operation you try on a still image can then be applied to each frame of a video.
The still-image example smooths a frame with a Gaussian filter before using Canny to find edges. The video example offers grayscale, edge, and motion-region previews. The motion mode compares brightness in consecutive frames to highlight changes, which is useful with a fixed camera.
On Rockchip boards, the system GStreamer pipeline uses MPP to decode the local video in hardware. Python OpenCV processes the decoded frames and displays them on the HDMI desktop. This guide starts with grayscale frames, then shows how to read the NV12 luma plane directly and compares the two preview paths on the board.
2. Prepare the environment
2.1 Supported board configurations and tested setup
The following two setups were tested with Python OpenCV 5.0.0:
| Board | OS and desktop | Kernel | Python |
|---|---|---|---|
| ArmSoM CM5 + CM5-IO (RK3576) | Debian 12 arm64 XFCE | 6.1.118-rk3576 | 3.11 |
| ArmSoM AIM7 (RK3588) | Ubuntu 22.04.5 LTS arm64 GNOME/X11 | 6.1.118-rk3588 | 3.10.12 |
The next table lists board and OS configurations provided by the SDK. For other combinations, check the dependencies in section 2.2 and verify the example on the target board.
The ArmSoM SDK shares Debian and Ubuntu rootfs build trees across its board configurations. The following are ArmSoM product configurations found in the SDK.
| SoC | Board configurations | OS configurations |
|---|---|---|
| RK3528 | Sige1 | Debian |
| RK3576 | AIM5, CM5 (CM5-IO and CM4 Nano B IO), Sige5 | Debian, Ubuntu |
| RK3588 / RK3588S | AIM7, CM7S, LM7, Sige7, Sige7S | Debian, Ubuntu |
The SDK includes ARM64 gst-rkmpp packages in the Debian 12, Ubuntu 22.04, and Ubuntu 24.04 rootfs trees. The table records SDK configurations. For the HDMI example, use a desktop image and verify that gst-inspect-1.0 mppvideodec succeeds and the local display is accessible. The still-image example only needs Python OpenCV and the input image.
2.2 Install and check dependencies
- Use a desktop image for your board. The verified versions are listed in section 2.1.
- Connect an HDMI monitor and start the graphical desktop. From the serial console, use an accessible X display. The tested display was
:0. - Ensure Python venv, FFmpeg (with
ffprobeandlibx264), and GStreamer are available. The image must providemppvideodec,qtdemux,h264parse, andvideoconvert. Ifmppvideodecis missing, check that the image includes the Rockchip MPP plugin. - Install the GUI-enabled Python OpenCV wheel in a virtual environment, or reuse an existing environment with the same version. The SDK and system OpenCV can stay as installed.
On first boot, connect HDMI, log in to the desktop, and connect Ethernet or join Wi-Fi from the desktop. Run these commands on the board. You can enter them over serial while the preview opens on the board desktop. Run APT commands as root, or prefix those commands with sudo.
apt update
apt install -y python3-venv curl ffmpeg x11-xserver-utils gstreamer1.0-tools python3-gi \
  gir1.2-gstreamer-1.0 gir1.2-gst-plugins-base-1.0

mkdir -p ~/cvproj
cd ~/cvproj
python3 -m venv venv
./venv/bin/python -m pip install --only-binary=:all: opencv-python==5.0.0.93
./venv/bin/python -c 'import cv2; print(cv2.__version__)'
# Check whether GStreamer can find the Rockchip MPP decoder.
gst-inspect-1.0 mppvideodec
for element in qtdemux h264parse videoconvert appsink; do
  gst-inspect-1.0 "$element" >/dev/null || break
done
DISPLAY=:0 xrandr --current
Check that OpenCV prints 5.0.0, gst-inspect-1.0 mppvideodec shows Factory Details or Plugin Details (this command only queries plugin information), the other element checks report no errors, and xrandr shows HDMI connected. If MPP or another element is missing, check the official desktop image and packages for your board before continuing. If the serial console cannot access the display, run from the HDMI desktop terminal or use the display and login user of the active session.
2.3 Troubleshoot APT on a fresh image
See Update the APT Package Source List for general instructions on checking, backing up, and refreshing sources. The AIM7 Ubuntu image showed two issues during testing:
- APT reports
Release file ... is not valid yet. Runtimedatectl statusand check the date, time, and time zone. The board clock was about a month behind during the test. Enable automatic time sync in the desktop settings, or set the current time manually if no sync service is available, then rerunapt update. From a serial console, usedate -s 'current date time UTC offset', replacing the entire quoted value before running it. - The update stalls at a third-party source included in the image. Confirm that
/etc/apt/sources.listcontains official Ubuntu sources matching the installed release. You can then skip/etc/apt/sources.list.d/for this invocation. Run these commands as root to refresh the index and install the missingpython3-venvpackage. If other dependencies are missing, use the same option with the installation command in section 2.2.
apt-get -o Dir::Etc::sourceparts=- -o Acquire::Retries=0 -o Acquire::http::Timeout=20 update
apt-get -o Dir::Etc::sourceparts=- install -y python3-venv
These options apply to the commands shown and leave the source files unchanged.
3. Complete Python example
Save mpp_preview.py in ~/cvproj/ on the board, or copy the complete code below into a file with that name. Run cd ~/cvproj && ./venv/bin/python mpp_preview.py --help to check the script and Python environment.
#!/usr/bin/env python3
"""Preview local H.264/H.265 MP4 video via Rockchip MPP and OpenCV."""
import argparse
import json
import os
from pathlib import Path
import subprocess
import time

os.environ.setdefault("DISPLAY", ":0")
os.environ.setdefault("QT_XCB_GL_INTEGRATION", "none")

import cv2
import numpy as np


def preview(path):
    probe = subprocess.check_output([
        "ffprobe", "-v", "error", "-select_streams", "v:0",
        "-show_entries", "stream=codec_name,width,height,avg_frame_rate",
        "-of", "json", str(path)
    ])
    stream = json.loads(probe)["streams"][0]
    parser = {"h264": "h264parse", "hevc": "h265parse"}.get(stream["codec_name"])
    if parser is None:
        raise ValueError("Expected H.264 or H.265 video in an MP4/MOV container")
    w, h = stream["width"], stream["height"]
    num, den = map(int, stream["avg_frame_rate"].split("/"))
    delay = max(1, round(1000 * den / num)) if num and den else 33
    stride = (w + 3) & ~3
    cmd = [
        "gst-launch-1.0", "-q", "filesrc", f"location={path}", "!",
        "qtdemux", "!", parser, "!", "mppvideodec", "!", "videoconvert",
        "!", f"video/x-raw,format=GRAY8,width={w},height={h}",
        "!", "fdsink", "fd=1", "sync=false"
    ]
    title = "RK3576 MPP - grayscale"
    frames = 0
    start = time.monotonic()
    stopped = False
    with subprocess.Popen(cmd, stdout=subprocess.PIPE) as decoder:
        try:
            while True:
                raw = decoder.stdout.read(stride * h)
                if not raw:
                    break
                if len(raw) != stride * h:
                    raise RuntimeError("Incomplete grayscale frame")
                gray = np.frombuffer(raw, np.uint8).reshape(h, stride)[:, :w]
                cv2.imshow(title, gray)
                frames += 1
                if cv2.waitKey(delay) & 255 in (27, ord("q")):
                    stopped = True
                    break
            if not stopped and decoder.wait(timeout=5):
                raise RuntimeError("MPP pipeline failed")
        finally:
            if decoder.poll() is None:
                decoder.kill()
            cv2.destroyAllWindows()
    if not frames:
        raise RuntimeError("MPP produced no video frames")
    elapsed = time.monotonic() - start
    print(f"elapsed={elapsed:.3f}s preview_fps={frames / elapsed:.2f}")
    print(f"OpenCV {cv2.__version__} | mppvideodec | {w}x{h} | frames={frames}")


if __name__ == "__main__":
    args = argparse.ArgumentParser(description=__doc__)
    args.add_argument("video", type=Path, help="Local H.264/H.265 MP4 or MOV path")
    path = args.parse_args().video.resolve()
    if not path.is_file():
        args.error(f"File not found: {path}")
    try:
        preview(path)
    except (OSError, ValueError, IndexError, RuntimeError, subprocess.SubprocessError, cv2.error) as exc:
        args.exit(1, f"Preview failed: {exc}\n")
4. Test with a 1080p clip
Download the 30-second Full HD sample and extract an eight-second segment starting at 12 seconds. If you already have a suitable H.264 MP4, pass its path to the script. Press q or Esc to exit early.
cd ~/cvproj
mkdir -p samples
curl -fL https://raw.githubusercontent.com/renesas-rz/media/main/Big_Buck_Bunny/big_buck_bunny_1080p_30fps_30s.mp4 \
  -o samples/bbb-source.mp4
ffmpeg -nostdin -ss 12 -i samples/bbb-source.mp4 -t 8 -an \
  -c:v libx264 -preset ultrafast -pix_fmt yuv420p samples/bbb-1080p.mp4
DISPLAY=:0 ./venv/bin/python mpp_preview.py samples/bbb-1080p.mp4
echo "TEST_EXIT=$?"
Big Buck Bunny © 2008 Blender Foundation, CC BY 3.0. The test source was trimmed and converted to grayscale for the screenshot.
Keep the window open until the clip finishes. For this sample, the terminal should print frames=240 and TEST_EXIT=0. Once the basic preview works, download the optimized script in section 7.2 and use section 7.3 to check all three modes.
The original download is saved to ~/cvproj/samples/bbb-source.mp4, and the trimmed 1080p clip is saved to ~/cvproj/samples/bbb-1080p.mp4. To watch the color clip, run xdg-open ~/cvproj/samples/bbb-1080p.mp4 from the board desktop terminal. The example displays grayscale, edge, and motion results in its preview window without saving a processed video.
5. Detect edges in a still image or video
5.1 Still-image edge detection
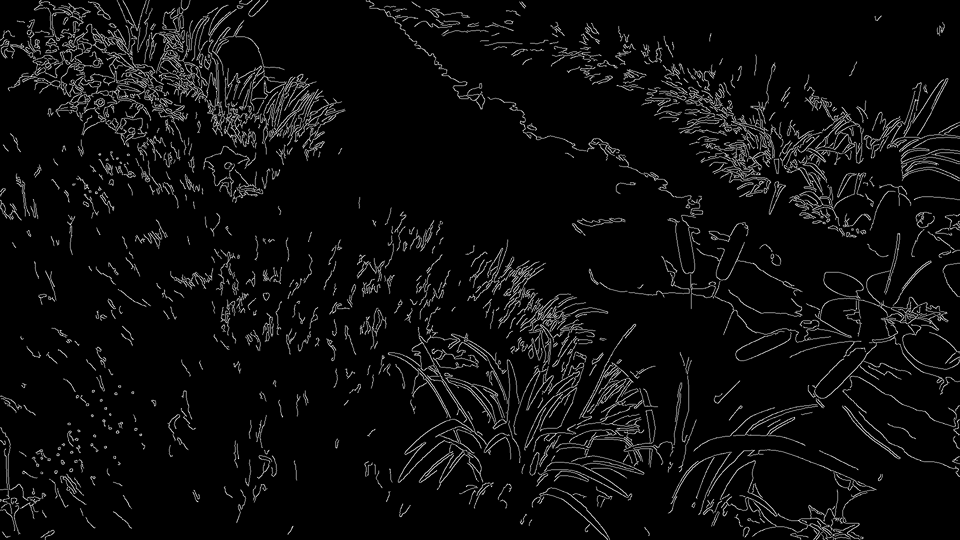
Extract a video frame and apply Gaussian smoothing before Canny edge detection. The output highlights contours for inspection.
ffmpeg -nostdin -ss 2 -i samples/bbb-1080p.mp4 -frames:v 1 samples/bbb-frame.jpg
./venv/bin/python - <<'PY'
import cv2

image = cv2.imread("samples/bbb-frame.jpg")
if image is None:
    raise RuntimeError("Cannot read the sample frame")
gray = cv2.cvtColor(image, cv2.COLOR_BGR2GRAY)
edges = cv2.Canny(cv2.GaussianBlur(gray, (5, 5), 0), 60, 160)
if not cv2.imwrite("samples/bbb-edges.png", edges):
    raise RuntimeError("Cannot save the edge image")
print("IMAGE_OK", edges.shape, cv2.countNonZero(edges))
PY
The extracted frame is saved to ~/cvproj/samples/bbb-frame.jpg, and the generated edge map is saved to ~/cvproj/samples/bbb-edges.png. After seeing IMAGE_OK, open the result directly with OpenCV on the HDMI desktop. Focus the image window and press any key to close it.
cd ~/cvproj
DISPLAY=:0 QT_XCB_GL_INTEGRATION=none ./venv/bin/python - <<'PY'
import cv2

image = cv2.imread("samples/bbb-edges.png", cv2.IMREAD_GRAYSCALE)
if image is None:
    raise SystemExit("Cannot read samples/bbb-edges.png")
cv2.namedWindow("Canny edges", cv2.WINDOW_NORMAL)
cv2.resizeWindow("Canny edges", 960, 540)
cv2.imshow("Canny edges", image)
cv2.waitKey(0)
cv2.destroyAllWindows()
PY
5.2 Video edge preview
The Python snippet below belongs inside mpp_preview.py. To run the edge preview directly, save the NV12 script as described in section 7.2, then run cd ~/cvproj && ./venv/bin/python mpp_nv12_preview.py samples/bbb-1080p.mp4 --mode edges in your shell.
For a video edge preview, replace cv2.imshow(title, gray) in the example with the following lines. Keep the indentation of the original line.
edges = cv2.Canny(cv2.GaussianBlur(gray, (5, 5), 0), 60, 160)
cv2.imshow(title, edges)
5.3 Motion regions in video
Initialize previous = None after frames = 0, then replace the original cv2.imshow(title, gray) line with the following code. White pixels mark changes in brightness between adjacent frames. A fixed camera makes moving objects easier to isolate, since camera movement can also highlight the background.
smooth = cv2.GaussianBlur(gray, (5, 5), 0)
if previous is None:
    mask = np.zeros_like(smooth)
else:
    diff = cv2.absdiff(smooth, previous)
    _, mask = cv2.threshold(diff, 25, 255, cv2.THRESH_BINARY)
previous = smooth
cv2.imshow(title, mask)
6. Board test results
6.1 Reproduce the board test
To reproduce the basic grayscale preview, follow section 4. To compare grayscale, edge, and motion previews with NV12, follow section 7.
6.2 Board screenshot and results
The CM5 with CM5-IO (RK3576), Debian 12 arm64 XFCE, and OpenCV 5.0.0 processed all 240 frames of the 1920×1080 H.264 clip in both grayscale and edge preview tests. The still-image case saved a 1920×1080 edge map. The screenshot below was captured from the running grayscale preview window on the board's HDMI desktop.
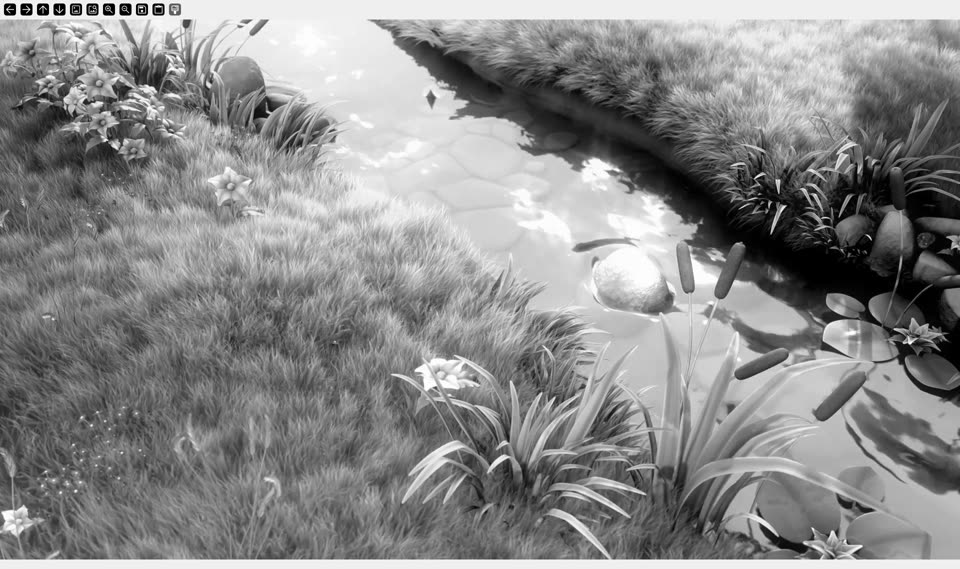
Big Buck Bunny © 2008 Blender Foundation, CC BY 3.0. The test source was trimmed and converted to grayscale for the screenshot.
OpenCV 5.0.0 | mppvideodec | 1920x1080 | frames=240
TEST_EXIT=0
6.3 Measured preview rate
HDMI-1 was configured for 1920×1080 at 60 Hz. The input clip was 30 fps. The preview rate below is the number of frames submitted to OpenCV divided by wall-clock time, including decoding, processing, and window event handling.
| Mode | Frames | Elapsed | Average preview rate |
|---|---|---|---|
| Grayscale | 240 | 20.045 s | 11.97 fps |
| Motion regions | 240 | 18.518 s | 12.96 fps |
Both runs exited with code 0. These are individual runs and do not establish a speed ranking. HDMI refresh is the output mode, and the application rate does not count distinct frames physically displayed by the monitor.
7. Optimize 1080p preview to nearly 30 fps
7.1 Isolate the bottleneck
The same 240-frame 1080p30 H.264 clip was tested on the CM5 via COM4, one pipeline at a time. Stage tests used fakesink sync=false with no window or playback pacing.
| Test path | Elapsed | Average rate |
|---|---|---|
| MPP decode → fakesink | 0.694 s | 345.82 fps |
MPP decode → GRAY8 via videoconvert → fakesink | 19.043 s | 12.60 fps |
| Original GRAY8 pipe → Python (window disabled) | 20.076 s | 11.95 fps |
| Original GRAY8 pipe → OpenCV window | 20.045 s | 11.97 fps |
| NV12 luma plane → OpenCV window | 8.018 s | 29.93 fps |
The GRAY8 conversion path dominated runtime on the tested image. Changing only waitKey to 1 ms yielded 12.50 fps at full size. Scaling to 960×540 before the pipe yielded 14.31 fps.
7.2 Read the NV12 luma plane directly
Keep the MPP output in NV12 and pull buffers through an in-process GStreamer appsink. The Y plane already contains luma. Read it with NumPy using the actual row stride and pass it to OpenCV for display. The measured frame width was 1920 and the row stride was 1984 bytes, so assuming tightly packed rows would read the wrong offsets. The script uses the source frame rate and a monotonic clock to calculate the remaining wait for each frame.
Save mpp_nv12_preview.py in ~/cvproj/. This variant handles H.264 MP4. It uses the existing OpenCV 5.0.0 virtual environment and system PyGObject and GStreamer introspection bindings that match its Python version. Check the bindings and run the example:
cd ~/cvproj
python3 -c 'import gi; gi.require_version("Gst", "1.0"); gi.require_version("GstVideo", "1.0"); from gi.repository import Gst, GstVideo'
DISPLAY=:0 ./venv/bin/python mpp_nv12_preview.py samples/bbb-1080p.mp4
NV12 luma 1920 1080 stride 1984
frames=240 elapsed=8.018s fps=29.93
The optimized preview retained 1920×1080, processed all 240 frames, and exited with code 0. The measured 29.93 fps is the average rate of frame submissions to the window, including playback pacing. The HDMI output mode was 60 Hz. The changes are limited to the Python example and the GStreamer pipeline.
7.3 Edge and motion preview results
Use --mode gray, --mode edges, or --mode motion to select the preview in the same script. Edge mode applies Gaussian smoothing and Canny detection to the Y plane. Motion mode takes the absolute difference between successive smoothed frames and thresholds it at 25. All modes share MPP decoding and the source-paced preview loop.
Download the updated script and run the following on the CM5 HDMI desktop. The test uses the same 1080p30 clip prepared in section 4.
cd ~/cvproj
for mode in gray edges motion; do
  DISPLAY=:0 ./venv/bin/python mpp_nv12_preview.py \
    samples/bbb-1080p.mp4 --mode "$mode"
done
| Mode | GRAY8 pipeline | NV12 pipeline | Frames |
|---|---|---|---|
| Grayscale | 11.97 fps | 29.94 fps | 240 |
| Edges | 13.29 fps | 29.93 fps | 240 |
| Motion regions | 12.59 fps | 29.94 fps | 240 |
All three NV12 runs exited with code 0. Edge and motion runs each took 8.017 seconds.
Rates count frames submitted to the OpenCV window. The NV12 script follows the 30 fps source cadence, so these figures describe preview performance rather than maximum algorithm throughput. The GRAY8 grayscale result is from section 7.1.
7.4 CM5 and AIM7 board comparison
Both boards used the same 1920×1080, 30 fps, 240-frame H.264 clip and the scripts linked in this guide. AIM7 running Ubuntu 22.04.5 GNOME/X11 also generated and displayed the 1080p Canny edge map. Both HDMI outputs were configured for 1080p at 60 Hz.
| Preview mode | CM5 · Debian 12 XFCE | AIM7 · Ubuntu 22.04 GNOME/X11 |
|---|---|---|
| Basic GRAY8 grayscale | 11.97 fps | 5.68 fps |
| NV12 grayscale | 29.94 fps | 29.95 fps |
| NV12 edges | 29.93 fps | 29.95 fps |
| NV12 motion regions | 29.94 fps | 29.96 fps |
All four AIM7 previews processed 240 frames and exited with code 0. Rates are average frame submissions to the window. The NV12 script follows the source cadence, and the boards used different operating systems and desktops. The results describe preview performance for each tested setup.