Jellyfin Media Server in Practice
This guide uses native APT installation, with systemd managing the Jellyfin service. Docker is not required, and you can follow this guide without completing the Docker Compose tutorial first. The test results below come from this native installation.
Download Jellyfin example archive
The archive contains only prepare-media.sh and media notes. Section 3 uses it to download and trim a test video and generate a poster. Video is downloaded from Blender's official site and is not stored in the documentation repository. You can also use your own media.
1. About Jellyfin
Jellyfin is an open-source media server that organizes movies, home videos and music stored on your board into libraries accessible from a browser, phone or TV client. Media, accounts and playback history stay on your own device. It provides a useful LAN media library and a practical introduction to Linux service management and video streaming.
The board manages and serves media; the client displays it. When the client supports the original file, direct playback is preferred. If the format is incompatible or the available bitrate is restricted, Jellyfin invokes its bundled FFmpeg to transcode. On Rockchip, MPP accesses the video decoding and encoding hardware, while RGA performs scaling and pixel-format conversion, reducing CPU video-processing work.
| Playback mode | Work on the board | Meaning |
|---|---|---|
| Direct Play | Sends the original file | No video transcoding; usually the preferred path |
| Remux or direct stream | Changes the container, possibly converts audio | Video can retain its original encoding |
| Transcode | Re-encodes video and scales when necessary | Triggered by lower quality settings or incompatible formats; RKMPP can accelerate it |
For optional Docker deployment, install Docker and Compose using Chapter 7, then use the official jellyfin/jellyfin image, persist /config and /cache, mount your media directory and publish port 8096. See the official container guide for a Compose example. RKMPP transcoding also requires device mappings and permissions; follow the Rockchip container instructions. Container deployment is not part of the tests reported here.
2. Environment and installation
2.1 Scope and tested setup
This method targets ArmSoM Debian / Ubuntu ARM64 systems. RK3576 and RK3588 / RK3588S boards can follow these instructions; hardware transcoding requires an image with MPP/RGA drivers and the devices listed below. The installation commands select the repository for the installed distribution, covering Debian 12 and Ubuntu 22.04. Performance figures come from the CM5 setup below.
| Item | Tested configuration |
|---|---|
| Board | ArmSoM CM5 + CM5-IO, RK3576, 2 GB RAM |
| System / kernel | ArmSoM Debian 12 arm64, 6.1.118-rk3576 |
| Jellyfin / bundled FFmpeg | 12.4 / 8.1.3-Jellyfin (8.1.3-2-bookworm) |
| Video devices | /dev/mpp_service, /dev/rga, /dev/dma_heap, /dev/dri |
| Client | Windows PC on the same LAN, Edge browser |
| Storage | About 24 GB free before installation; allow at least 2 GB for media preparation |
A Rockchip BSP kernel with MPP/RGA drivers is required. Generic mainline kernels, third-party images and other boards need separate validation. This guide verifies SDR H.264 and makes no claim for 4K, concurrent streams or HDR tone mapping. Leave unverified HDR tone-mapping options disabled on RK3576.
2.2 Install official packages
Run the following commands in a root terminal on the board; ordinary users can enter one with sudo -i. The board needs internet access, and the PC must be on the same LAN. Check the clock and repositories using the APT guide, then install dependencies:
apt update
apt install -y ca-certificates curl gnupg unzip
Add Jellyfin's official repository. The commands read the installed distribution: ID must be debian or ubuntu. Do not add a Debian repository to Ubuntu.
install -d -m 0755 /etc/apt/keyrings
curl -fsSL https://repo.jellyfin.org/jellyfin_team.gpg.key \
  | gpg --dearmor --yes -o /etc/apt/keyrings/jellyfin.gpg
. /etc/os-release
cat > /etc/apt/sources.list.d/jellyfin.sources <<EOF
Types: deb
URIs: https://repo.jellyfin.org/$ID
Suites: $VERSION_CODENAME
Components: main
Architectures: $(dpkg --print-architecture)
Signed-By: /etc/apt/keyrings/jellyfin.gpg
EOF
Ubuntu 22.04 needs universe for dependencies. If it is not enabled, run apt install -y software-properties-common, then add-apt-repository universe. For other derivatives, see the Jellyfin installation instructions.
Resolve repository index errors using the APT guide before continuing:
apt update
apt install -y jellyfin
systemctl enable --now jellyfin
systemctl is-active jellyfin
ip -br address
After seeing active, note the board's LAN IPv4 address. On the PC, open http://BOARD_IP:8096, for example http://192.168.1.137:8096. Allow the first startup to finish initialization.
The jellyfin package installs the server, web client and bundled FFmpeg. This guide uses /usr/lib/jellyfin-ffmpeg/ffmpeg, which includes RKMPP/RGA support. Do not change the dashboard path to /usr/bin/ffmpeg. Existing Jellyfin installations should be backed up and follow the official upgrade path.
3. Add and play media
3.1 Prepare a test video
Download the archive at the start of this article, transfer it to ~/jellyfin-demo/ on the board and extract it. Alternatively, run:
mkdir -p ~/jellyfin-demo
cd ~/jellyfin-demo
curl -fL https://docs.armsom.org/downloads/jellyfin/jellyfin-example.tar.gz \
  -o jellyfin-example.tar.gz
tar -xzf jellyfin-example.tar.gz
bash prepare-media.sh
The script downloads an approximately 557 MiB archive of Tears of Steel, extracts minutes 1–2 and creates a 60-second, 1920×1080, 24 fps H.264 + AAC MP4. The original picture is 1920×800; black bars are added above and below without stretching. The first download and preparation take a few minutes. Preparation uses software encoding and does not measure Jellyfin hardware-transcoding speed.
| File | Board path |
|---|---|
| Final video, approximately 20.1 MiB | /srv/jellyfin/media/tears-of-steel-1080p.mp4 |
| Poster | /srv/jellyfin/media/tears-of-steel-1080p-poster.jpg |
| Original ZIP and MOV | /srv/jellyfin/downloads/ |
Media and screenshots are from Tears of Steel (2012), © Blender Foundation, used under CC BY 3.0. This guide uses a trimmed excerpt with added black bars. Project and attribution details.
To skip the download, run install -d -m 755 /srv/jellyfin/media, copy media into that directory and ensure the jellyfin user can read it. Avoid placing the library under /root, which ordinary service accounts usually cannot enter.
3.2 Complete setup and verify direct playback
Choose English in the initial wizard. On an existing installation, change the display language under User menu → Settings → Display, save, then refresh the page. Interface language and library metadata language are separate settings; neither requires changing the board's system language. The screenshots in this English guide use the English interface.
- In the browser wizard, choose a server name and language, then create your own administrator account and password.
- Add a library with content type Home Videos and Photos, name
ArmSoM Demo, and folder/srv/jellyfin/media. - Select the metadata language and country. This example needs LAN access only, so remote access can be disabled. Finish the wizard and sign in.
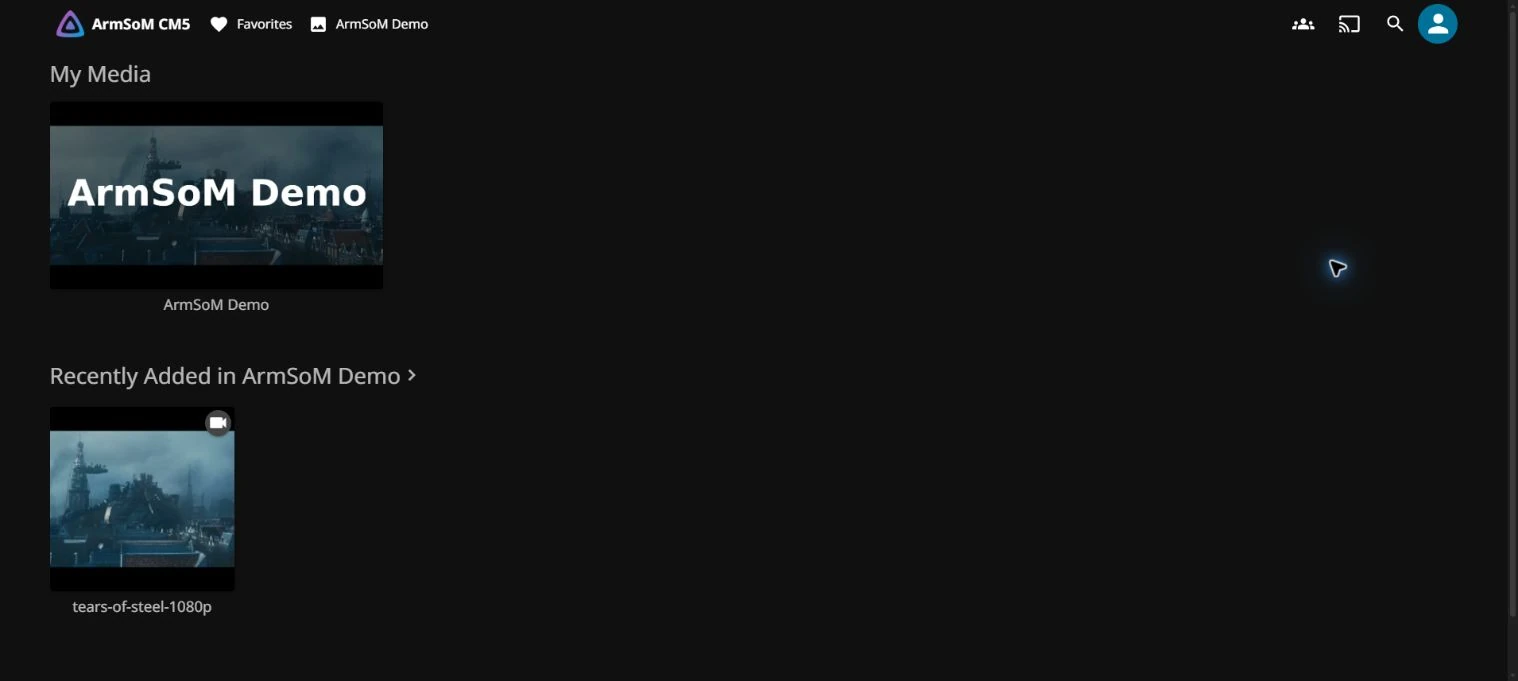
After the library scan, the home page shows ArmSoM Demo under My Media, with the recently added test video below it. Select the library card to browse videos, or start playback directly from the video's poster.
- After scanning, open
tears-of-steel-1080pand select Play. If it is missing, use Scan All Libraries in the dashboard's library page, then refresh the page. - In the player, select Settings → Quality → Auto, then open Playback Info. This sample should direct-play in Edge. If it transcodes, check the reported reason first.
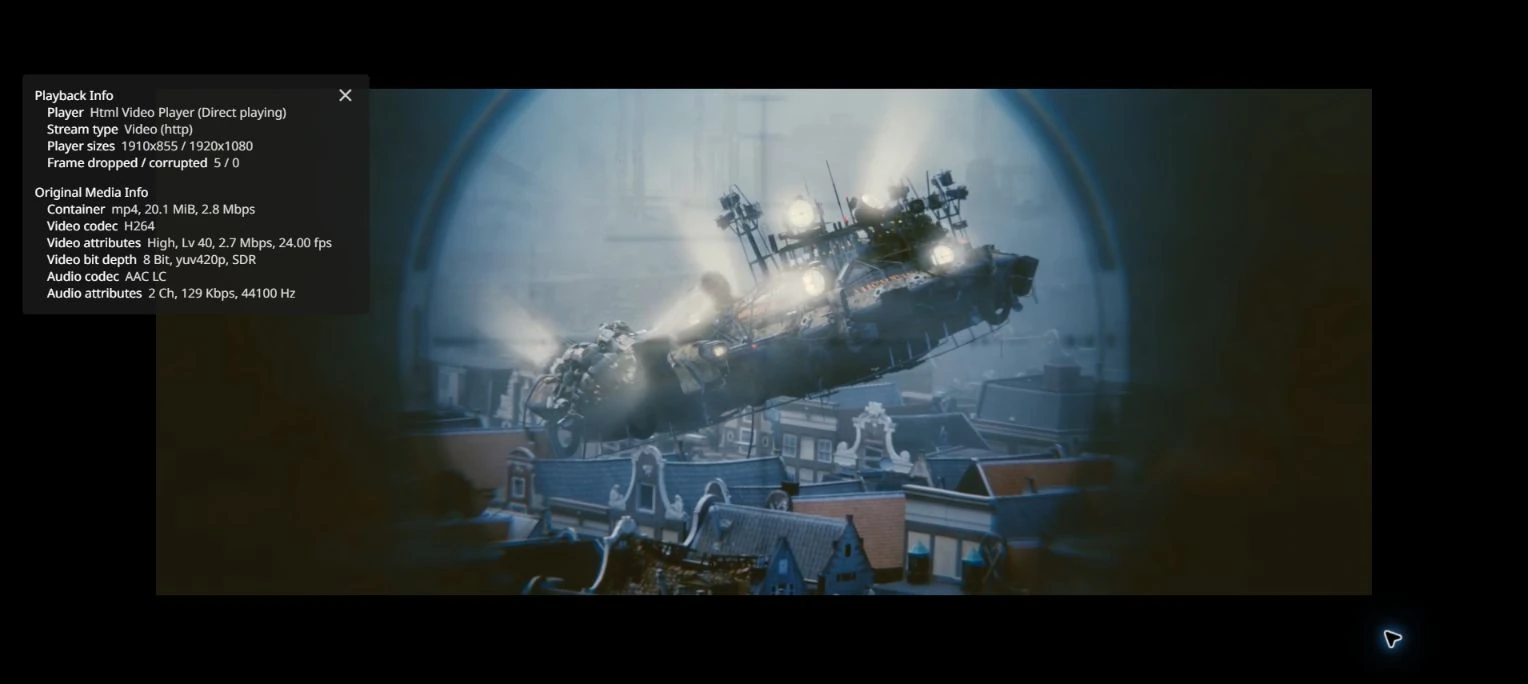
This tutorial is for a trusted LAN and needs no router port forwarding. Set your own administrator password; the archive supplies no shared password. Access from other networks needs separate HTTPS and access-control configuration.
4. RKMPP hardware transcoding
4.1 Give the service account device access
Check that the devices exist, add the service account to their groups, then restart the service to apply membership:
ls -l /dev/mpp_service /dev/rga /dev/dma_heap /dev/dri
usermod -aG video,render jellyfin
systemctl restart jellyfin
id jellyfin
On the tested image, MPP, RGA and system DMA heap devices use the video group; DRM render devices use render. Both should appear in id jellyfin. If devices are missing or permissions differ, check drivers and udev permissions using the Jellyfin Rockchip guide, rather than applying global chmod 777 permissions.
4.2 Enable acceleration and trigger transcoding
Open User menu → Dashboard → Playback → Transcoding, apply the following settings and save:
| Setting | Value for this example |
|---|---|
| Hardware acceleration | Rockchip MPP (RKMPP) |
| Hardware decoding formats | Enable H.264; enable other formats after validating them |
| Hardware encoding | Enabled |
| HEVC / AV1 encoding and tone mapping | Disabled for this example |
| Throttle transcodes | Disabled to measure full-clip transcoding throughput |
| FFmpeg path | Keep /usr/lib/jellyfin-ffmpeg/ffmpeg |
If a hardware-acceleration notice appears on the first save, select OK to apply the configuration.
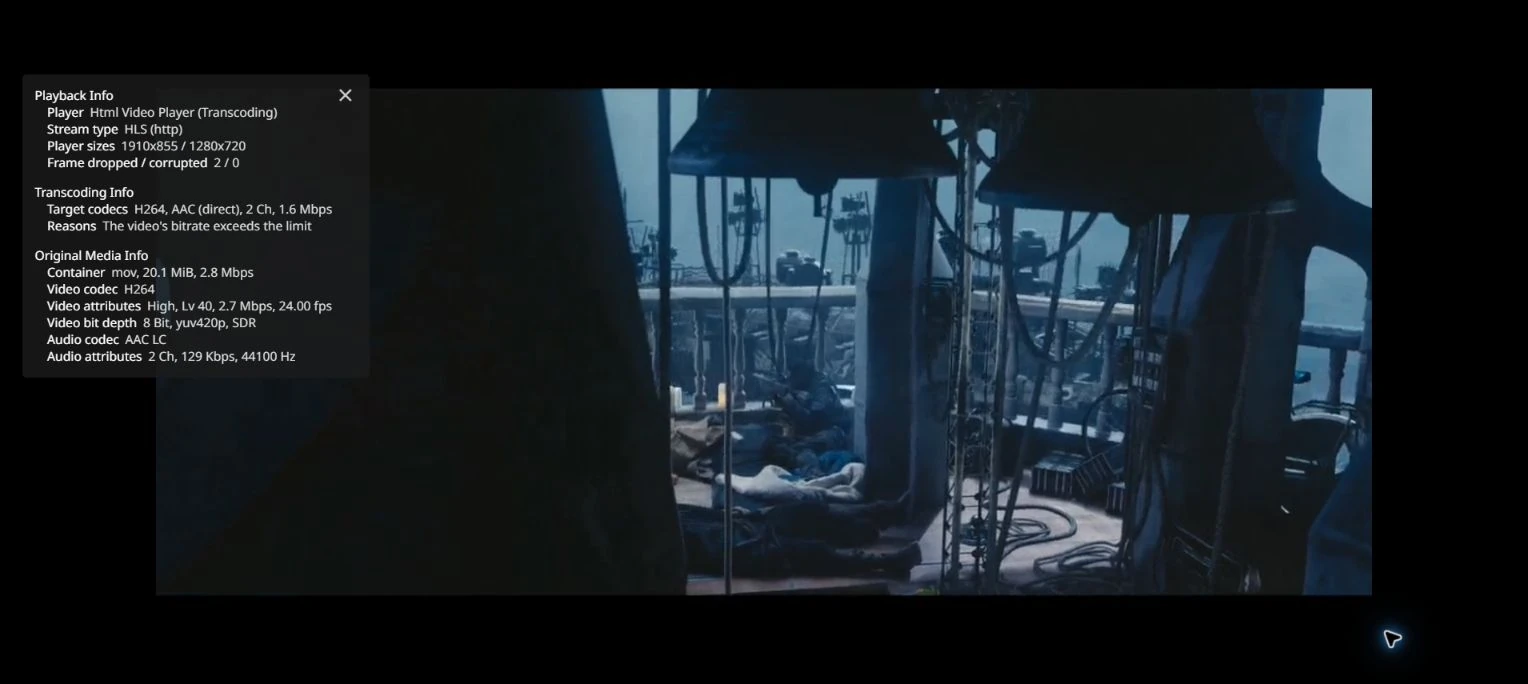
Play the sample again and choose Settings → Quality → 1.5 Mbps. This is below the original file's bitrate and triggered 1080p → 720p transcoding in testing. Playback Info should show transcoding and HLS. Select Auto again to try direct playback at original quality.
After selecting 1.5 Mbps, exit playback and play the sample again from the beginning, keeping that quality setting. Changing quality midway transcodes only the remaining portion, so its frame count and duration differ from the full 1440-frame results below.
H.264 file → MPP decode → RGA scale → MPP H.264 encode
          → HLS segments → LAN browser playback
4.3 Confirm hardware is actually used
“Transcoding” in Playback Info does not by itself prove hardware acceleration. On the board, inspect the latest transcoding log for the actual command and result:
LOG=$(ls -t /var/log/jellyfin/FFmpeg.Transcode-*.log | head -n 1)
grep -E 'hwaccel rkmpp|vpp_rkrga|h264_rkmpp|Lsize=' "$LOG"
The tested log contains -hwaccel rkmpp, vpp_rkrga=w=1280:h=720, and:
Stream #0:0 -> #0:0 (h264 (h264_rkmpp) -> h264 (h264_rkmpp))
Stream #0:1 -> #0:1 (copy)
Video is hardware-decoded and hardware-encoded; audio is copied. If no transcoding log exists, first check whether playback is direct.
| Test | Result |
|---|---|
| Library scan | H.264 / AAC, 1920×1080, 24 fps, 60 seconds recognized |
| Auto quality | Original-quality direct playback in Edge, without video re-encoding |
| 1.5 Mbps quality | RKMPP decode + RGA scaling + RKMPP encode; 1280×720 H.264 output with AAC copied |
| Transcoding processing | Full 1440-frame clip: approximately 506 fps, with encoding completed in 2.84 seconds |
| Browser playback | 573 frames / 23.85 seconds for direct play; 696 frames / 29.01 seconds for transcoded playback. Both were approximately 24.0 fps, with zero additional dropped frames in either sampling window |
| Service restart | Accounts, library and hardware-acceleration settings retained; access and playback still work |
| Backup with service stopped | Archive containing configuration and databases created successfully; playback works after restarting the service. Restoration was not tested |
506 fps is short-clip transcoding throughput; 24.0 fps comes from the client's frame counter, not the display refresh rate. Dropped frames in the table are increments within the sampling window; screenshots show cumulative counts from another playback run. This was one SDR stream with throttling disabled, not a concurrency test. With throttling enabled, pausing encoding after enough segments are buffered is normal.
5. Data and maintenance
5.1 Where files are stored
| Content | Default location |
|---|---|
| Video and poster | This guide uses /srv/jellyfin/media/ |
| Configuration | /etc/jellyfin/ |
| Database, accounts and library information | /var/lib/jellyfin/ |
| Temporary transcoding segments | /var/cache/jellyfin/transcodes/ |
| Server and FFmpeg logs | /var/log/jellyfin/ |
Jellyfin produces temporary playback segments. It neither overwrites the original video nor automatically saves a permanent transcoded MP4. To create lasting output files, see the Rockchip video codec examples. For a large library, use separate SSD / USB storage, mount it consistently before adding its library path, and check service-account read permissions.
5.2 Check status and back up
systemctl status jellyfin --no-pager
journalctl -u jellyfin -n 50 --no-pager
Before upgrading, stop the service, back up its configuration and database, then start it again:
systemctl stop jellyfin
tar -C / -czf "/root/jellyfin-backup-$(date +%F-%H%M%S).tar.gz" \
  etc/jellyfin var/lib/jellyfin
systemctl start jellyfin
The archive is saved under /root/ and excludes original media; back up videos separately. Jellyfin is enabled to start at boot. Before upgrading, review the official upgrade instructions and check repositories with the APT guide, avoiding unsupported database upgrade jumps.
6. Troubleshooting and extensions
| Symptom | First checks |
|---|---|
| APT certificate, Release timestamp or repository connection errors | Follow APT troubleshooting to check time, DNS and repositories; keep signature verification enabled |
| Browser cannot connect | Check board IP, systemctl is-active jellyfin, LAN connectivity and TCP 8096 firewall rules |
| Server mismatch after reflashing | Confirm that the IP belongs to the reflashed board, then select Connect Anyway to enter setup again; previous accounts and libraries are not restored automatically |
| Empty folders or missing media | Check library path and jellyfin permissions; try sudo -u jellyfin ls /srv/jellyfin/media, then scan again |
| RKMPP enabled but no transcoding log | Direct playback needs no encoding; lower quality and inspect the log again |
| Permission denied or device initialization failure | Check MPP/RGA devices, groups and bundled FFmpeg; restart after adding group membership |
| A different video fails or stutters | Check codec, bit depth, HDR, subtitle burn-in, disk and network load; compare with this SDR sample first |
For the underlying pipeline, continue with the FFmpeg installation guide and Rockchip video codec examples. Validate containers, HDR, subtitle burn-in and multiple users separately after the single-stream test works, so failures remain easier to isolate.